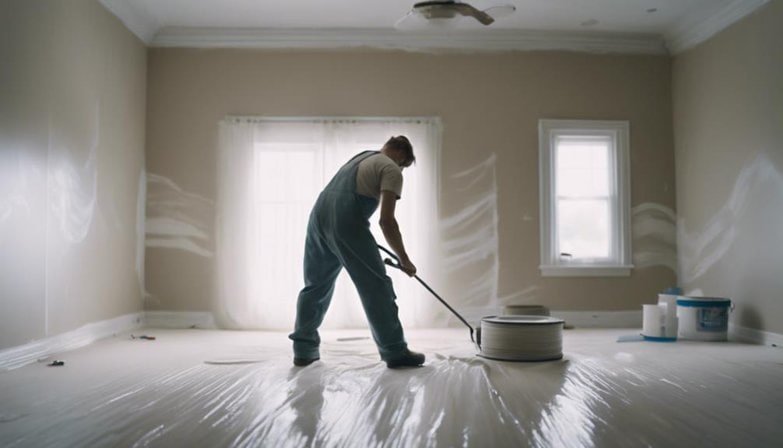
Latex Paints for Interior Walls

Benefits of Choosing Latex Paints for Interior Walls
Latex paints offer eco-friendliness due to low VOCs, ease of cleaning with soap and water, and simple application with brushes or rollers.
They dry quickly, allowing for multiple coats in one day, and provide a durable finish that resists chipping and fading.
Available in various finishes like flat, eggshell, satin, and semi-gloss, latex paints are also cost-effective, covering well with fewer coats.
Key Takeaways
- Latex paints have low VOCs, making them healthier for indoor environments.
- They offer easy cleanup with soap and water, ideal for DIY projects.
- Available in multiple finishes, catering to different areas of the home.
- Quick drying time allows for efficient project completion.
- Durable finish resists chipping, fading, and frequent cleaning.
Benefits of Latex Paints

When you’re selecting paint for your interior walls, latex paints offer several compelling benefits. One of the standout features is their eco-friendly composition. Latex paints are water-based, making them a more environmentally responsible option compared to oil-based alternatives. You’ll also appreciate their low VOCs (volatile organic compounds), which means fewer harmful chemicals are released into the air, ensuring a healthier indoor environment.
Another advantage is the easy cleanup. Since latex paints are water-soluble, you can clean your brushes and rollers with just soap and water. This simplicity saves you time and hassle, letting you get back to enjoying your space sooner.
Latex paints also provide a durable finish, standing up to wear and tear better than traditional paints. This durability means your walls will look fresh and vibrant for longer, reducing the need for frequent touch-ups.
Additionally, latex paints are quick drying, allowing you to complete your painting projects faster. This speed not only saves you time but also minimizes disruptions in your daily life.
With all these benefits, latex paint is a smart choice for anyone looking to improve their living space efficiently and responsibly.
Application of latex paints in your house
Living Rooms and Bedrooms:
- Reason: Latex paints are ideal for these spaces as they offer a smooth finish and come in a wide variety of colors and sheens. They are also less likely to yellow over time compared to oil-based paints.
- Finish: Flat or matte finishes are good for living rooms and bedrooms as they hide imperfections. Eggshell or satin finishes can also be used for a slight sheen and added durability.
Kitchens and Bathrooms:
- Reason: These areas are prone to moisture and stains. Latex paints, especially those labeled as “kitchen and bath” paints, have mildew-resistant properties and are easier to clean.
- Finish: Semi-gloss or satin finishes are recommended as they are more durable and easier to wipe down.
Hallways and Corridors:
- Reason: These high-traffic areas benefit from the durability and easy maintenance of latex paint. They often experience scuffing and dirt, which latex paint can withstand better.
- Finish: Eggshell or satin finishes are good choices as they are more durable and easier to clean than flat finishes.
Children’s Rooms:
- Reason: Latex paints are safer as they have lower levels of volatile organic compounds (VOCs). They are also easy to clean, making them ideal for spaces where walls might get marked or drawn on.
- Finish: Satin or semi-gloss finishes are recommended for their durability and ease of cleaning.
Ceilings:
- Reason: Latex paints are often used for ceilings due to their quick-drying nature and easy application.
- Finish: Flat or matte finishes are preferred as they help hide imperfections and provide a uniform look.
Basements:
- Reason: Latex paints are flexible and can withstand the expansion and contraction of walls in areas with fluctuating temperatures and moisture levels.
- Finish: A satin finish can provide a balance between durability and appearance, especially if the basement is used as a living space.
General Tips for Using Latex Paints
- Surface Preparation: Ensure the walls are clean, dry, and free of any peeling paint. Use primer if needed, especially on new or repaired walls.
- Application Tools: Use high-quality brushes and rollers for a smooth finish. Consider using a paint sprayer for large areas.
- Ventilation: Ensure good ventilation while painting and during drying to avoid inhaling fumes, even though latex paints have lower VOC levels.
- Drying Time: Allow adequate drying time between coats, as recommended by the manufacturer, to achieve the best results.
How Long Does Latex Paint Last on Walls?
Latex paint is known for its durability and longevity when properly applied and maintained. Typically, latex paint on interior walls lasts between 5 to 10 years under normal conditions. Several factors affect its longevity. Higher quality latex paints tend to last longer due to better resins and pigments.
| Factor | Description | Impact on Longevity | Recommendations |
|---|---|---|---|
| Quality of Paint | Higher quality paints contain better resins and pigments, providing a more durable finish. | High-quality paint can last up to 10 years or more. | Invest in premium latex paint brands. |
| Surface Preparation | Proper cleaning, priming, and repair of surfaces before painting. | Good preparation can add several years to the paint’s lifespan. | Thoroughly clean and prime surfaces before painting. |
| Application Method | Use of appropriate brushes, rollers, or sprayers and correct painting techniques. | Proper application ensures an even and durable finish. | Use high-quality tools and follow best practices for application. |
| Environmental Conditions | Humidity, temperature changes, and exposure to sunlight. | Adverse conditions can reduce lifespan by 2-5 years. | Use paints formulated for specific conditions and control indoor climate. |
| Maintenance | Regular cleaning and minor touch-ups to maintain appearance. | Proper maintenance can extend lifespan by 2-3 years. | Clean walls regularly and address any damage promptly. |
| Location in Home | High-traffic areas like hallways and children’s rooms vs. low-traffic areas like bedrooms. | High-traffic areas may need repainting every 3-5 years. | Consider using more durable finishes in high-traffic areas. |
Proper surface preparation, including cleaning, priming, and repairing surfaces before painting, can significantly extend the paint’s lifespan. Environmental conditions such as high humidity, frequent temperature changes, or heavy use can reduce the lifespan of the paint. Regular maintenance, including cleaning and minor touch-ups, can help maintain the appearance and extend the longevity of the paint.
Choosing the Right Shade
Choosing the correct shade of latex paint is just as vital as understanding its advantages for achieving the ideal appearance in your home. Start by considering color psychology: different hues evoke different emotions. For instance, blues and greens can create a calming atmosphere, while reds and yellows are energizing.
Next, think about the lighting effects in each room. Natural light can make colors look brighter, while artificial lighting can add warmth or coolness.
Stay updated with current trends, but keep in mind that your personal style should guide your choices. Trends like bold accent walls or muted pastels are popular, but you should pick what resonates with you.
Pairing complementary colors can add depth and interest to your space. For example, a soft gray with a vibrant teal can be striking.
Consider the room function as well. A bedroom might benefit from soothing tones for relaxation, whereas a home office could use stimulating colors to enhance productivity. By understanding these factors, you can make informed decisions and create a space that truly reflects your personality and meets your needs.
Preparing Your Walls

Properly preparing your walls guarantees that your latex paint will adhere well and look flawless. Start by thoroughly cleaning your walls to remove dust, grease, and grime. A clean surface guarantees the paint bonds effectively.
Next, conduct a surface inspection to identify any imperfections such as cracks or holes. To address these issues, follow these steps:
- Patching holes: Use a suitable filler to patch up any holes or cracks. Make sure the patched areas are smooth and flush with the wall.
- Sanding walls: Once the filler is dry, sand the patched areas and any rough spots on the wall. This creates a smooth surface that’s ready for painting.
- Primer application: Apply a good-quality primer to the walls. Primer helps the paint adhere better and evens out any surface variations.
Tools You’ll Need
Having the appropriate tools guarantees your painting project goes smoothly and yields professional results. To start, you’ll need to focus on brush selection. Choose brushes specifically designed for latex paint to achieve cleaner lines and smoother finishes. Next, consider roller types. Rollers with a 3/8-inch to 1/2-inch nap are ideal for most interior walls, giving you an even coat without excessive texture.
Painter’s tape is crucial for protecting trim, edges, and areas where you don’t want paint. Apply it carefully to ensure sharp, clean lines. Drop cloths safeguard your floors and furniture from splatters and spills. Opt for canvas drop cloths as they’re durable and reusable. Lastly, paint trays make it easier to load your brush or roller without making a mess. Look for sturdy trays with disposable liners for easy cleanup.
Here’s a quick rundown of the tools you’ll need:
| Tool | Purpose |
|---|---|
| Brushes | Clean lines and smooth finish |
| Rollers | Even coat application |
| Painter’s Tape | Protects non-paint areas |
| Drop Cloths | Floor and furniture protection |
| Paint Trays | Convenient paint loading |
With these tools in hand, you’re well-prepared to tackle your painting project with confidence.
Latex Paint Application Techniques

Mastering application techniques guarantees your latex paint job looks professional and lasts for years. Start by choosing the right brush for cutting in—those areas where walls meet ceilings, corners, and trim. Opt for an angled sash brush for precision.
For rolling techniques, use a roller with a proper nap length suited to your wall texture. A smoother surface benefits from a short nap, while textured walls need a longer nap.
When you’re ready to begin, follow these steps:
- Cutting In Methods: Use your brush to cut in along edges initially. This creates a border that helps prevent roller marks.
- Rolling Techniques: Load your roller evenly and roll in a ‘W’ or ‘M’ pattern to distribute the paint. This guarantees even coverage without streaks.
- Paint Layering: Apply multiple thin layers rather than one thick coat. This helps the paint adhere better and provides a smoother finish.
Drying and Curing Times
Once you’ve applied the paint with the right techniques, understanding drying and curing times is key to achieving a flawless finish. Drying times for latex paint typically range between one to two hours, but several factors can influence this. High humidity levels can extend drying times, so aim to paint when the air is dry. Ventilation needs are essential; keep windows open or use fans to guarantee good air circulation.
Temperature effects also play a significant role. Ideal temperatures for drying range from 50°F to 85°F. Extreme cold or heat can hinder the process, so monitor the room’s climate. Primer usage can impact drying times too; a quality primer will create a better surface for the paint to adhere to, speeding up the drying process.
| Factor | Impact on Drying Time |
|---|---|
| Humidity Levels | Higher humidity = longer time |
| Temperature Effects | Extreme temperatures = longer time |
| Ventilation Needs | Better ventilation = shorter time |
Curing, which is the complete hardening of the paint, can take up to two weeks. During this period, avoid heavy cleaning or touch up requirements. Understanding these elements allows you to plan your project efficiently and achieve the best results.
Maintenance Tips

Proper upkeep of your latex-painted interior walls will guarantee they stay vibrant and damage-free for years to come. Establish a regular cleaning schedule to prevent dirt buildup. Use a soft cloth or sponge with mild detergent to wipe down walls every few months. For stubborn stains, a mixture of baking soda and water can work wonders.
To address any damages, plan touch-ups on a quarterly basis. This frequency ensures that minor chips or scratches don’t become noticeable. Keep a small amount of paint from your original project for accurate color matching. If sections of your wall show significant wear, consider repainting intervals every 5-7 years.
Here are a few important tips:
- Stain Removal: Act quickly when spills occur. The faster you clean, the less likely stains will set.
- Mildew Prevention: Ensure proper ventilation in high-moisture areas like bathrooms. Use a dehumidifier if necessary.
- Touch Ups Frequency: Regular touch-ups keep your walls looking fresh and prevent minor imperfections from becoming eyesores.
